
How to Make a Hand-Sewn Drawstring Project Bag (No Machine Necessary)
Because not everyone who has an interest in sewing has a sewing machine, I decided to share this tutorial for a hand-sewn drawstring bag. The idea came to me this summer when I made drawstring project bags as gifts for participants of the crochet workshop that I offered in July.
Although, ideally, one would use vintage napkins for this project, I don’t have a ready supply of those, nor do I get out to go thrift shopping very often. I found the napkins I used for this project at World Market this summer.
I used large, visible stitches for this project in a contrasting thread color, but you can make smaller, less visible stitches or use a matching thread if you choose.
Supply List:
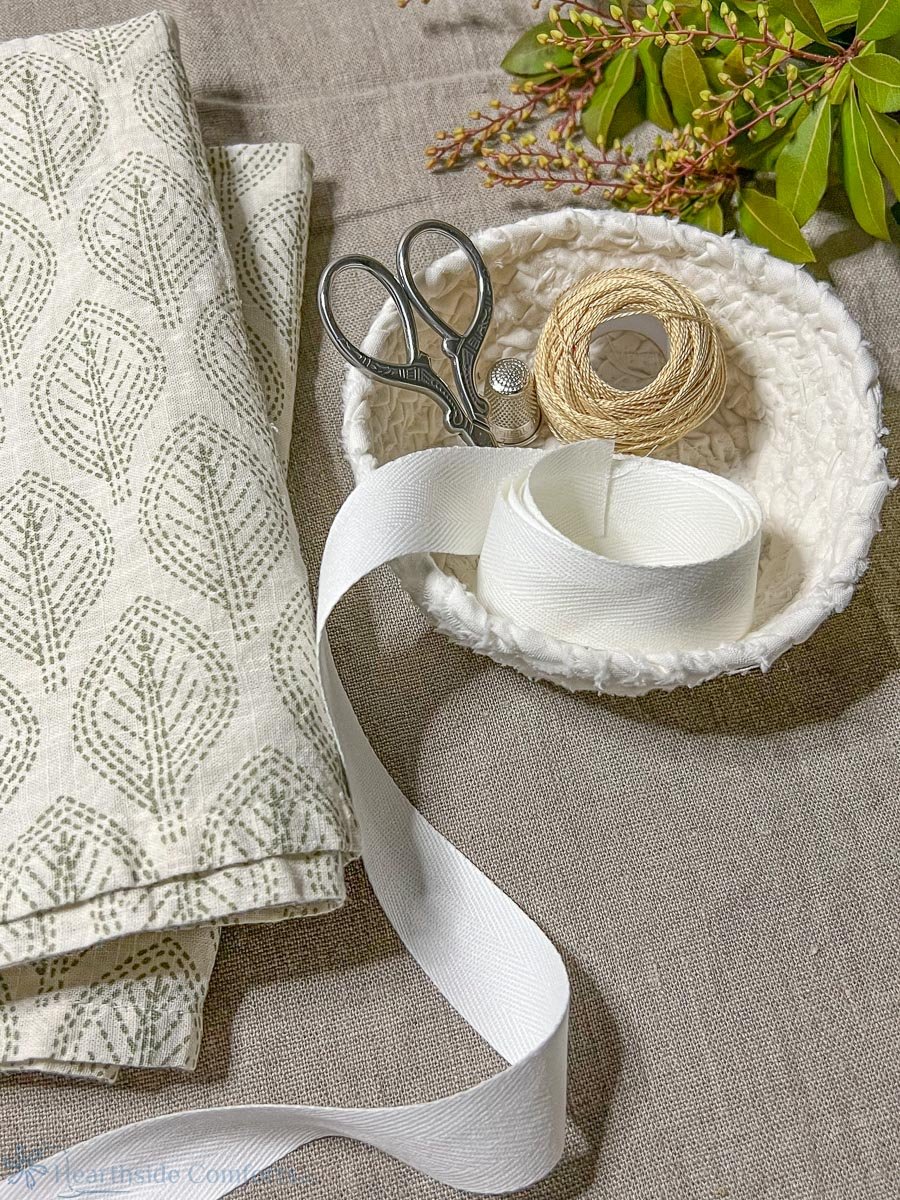
2 square cloth napkins (I used 20”)
Sewing thread or DMC floss (I used DMC pearl cotton, size #8)
Needle (I used blunt-point, needlepoint/tapestry needle, size 24)
Thimble
Ruler
3 yards of lightweight cotton twill tape or ribbon, 1” wide, cut into 2 pieces, 1 1/2 yards each
Safety pin
Instructions:
1) Prewash napkins and press if needed.
2) Make a casing* at the top of each napkin by folding the top down by 1 1/2” and sewing with a running stitch** 1 1/4” from the fold, with the wrong side*** of the fabric on the inside of the fold. Make sure your thread is knotted to hold it in place. (If your drawstring is narrower than 1” make the casing smaller to better fit the drawstring.)

3) Lay napkins together, wrong sides facing, folded casings aligned at the top.

4) Beginning at casing seam on one edge, leaving the folded casing open, run the needle with knotted thread between the layers coming up to the top layer, then wrap the threaded needle around the edge of the napkins, and bring the needle through to the top layer again several times to secure the seam well.
Then continue sewing a whip stitch*** around the sides and bottom of the bag by taking the needle around to the back of the edges, inserting it into the fabric and then bringing it forward to the top layer, creating stitches that are about 1/8” apart. (The napkins that I purchased at World Market were not exactly the same size, and I ended up needing to make a tuck in the fabric at one spot to get them to fit together).

5) End the seam at the casing opening on the other side, again wrapping the thread several times to secure it. Knot the thread and pull the needle between the layers to hide the thread on the inside. Clip the thread, leaving about 1/4” tail.
6) Fold the end of one of the drawstring pieces and place a safety pin in the folded end.

7) Run the drawstring through the casing, going across the top of the bag, doing a U-turn at the other end and bringing it back through to the side on which you began. Remove the safety pin and knot the ends together. If you don’t want the ends of the ribbon or twill tape to fray, you could use a product known as Fray Check to keep the ends from unraveling; however, because the drawstring is knotted, I chose to let mine fray, even pulling out some of the strings to create a fringed-edge.
8) Repeat step 7, but start from the other side this time so that you have a knotted drawstring on each side of the bag.

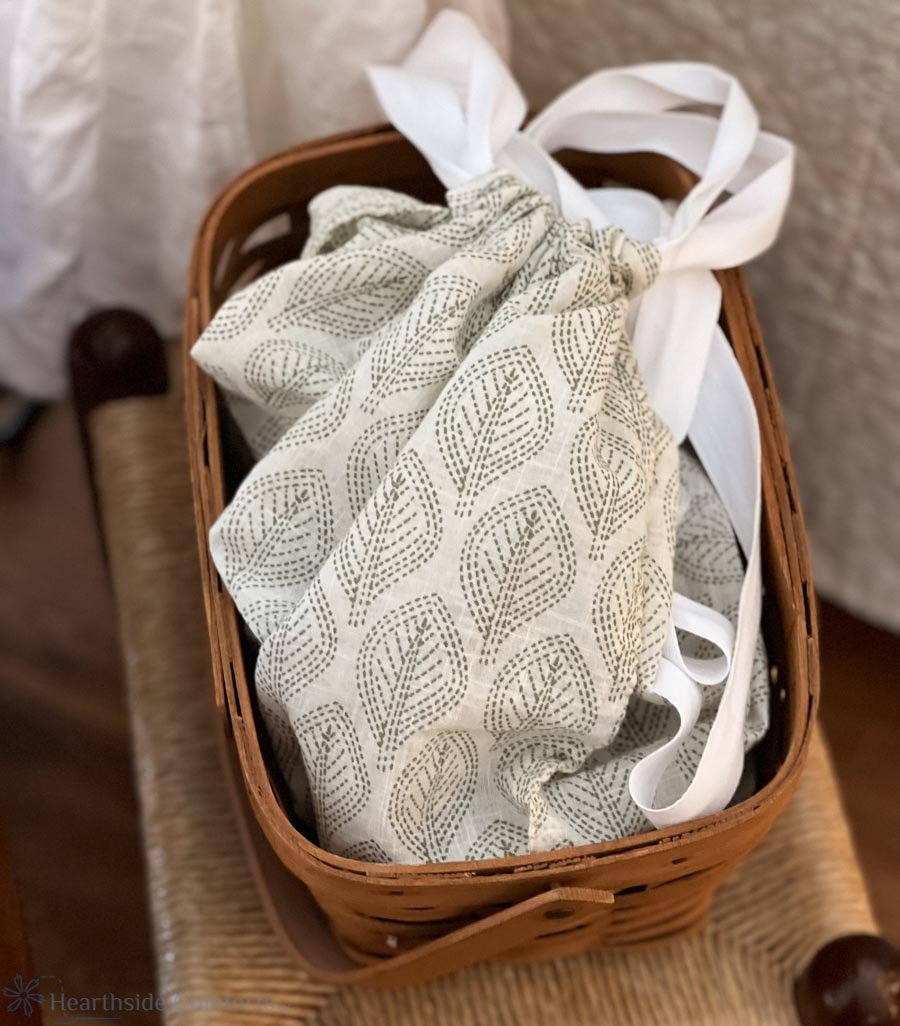
And you are finished! The bag is ready to fill with whatever project you are working on or to give as a gift.
By the way, the yarn shown in this picture is on sale (automatic 20% discount) until Monday, December 13. This organic cotton yarn by Appalachian Baby is grown on small farms in the US, and it lovely! I am using the chunky weight organic cotton yarn, but the company also offers sport weight yarn in a variety of colors.
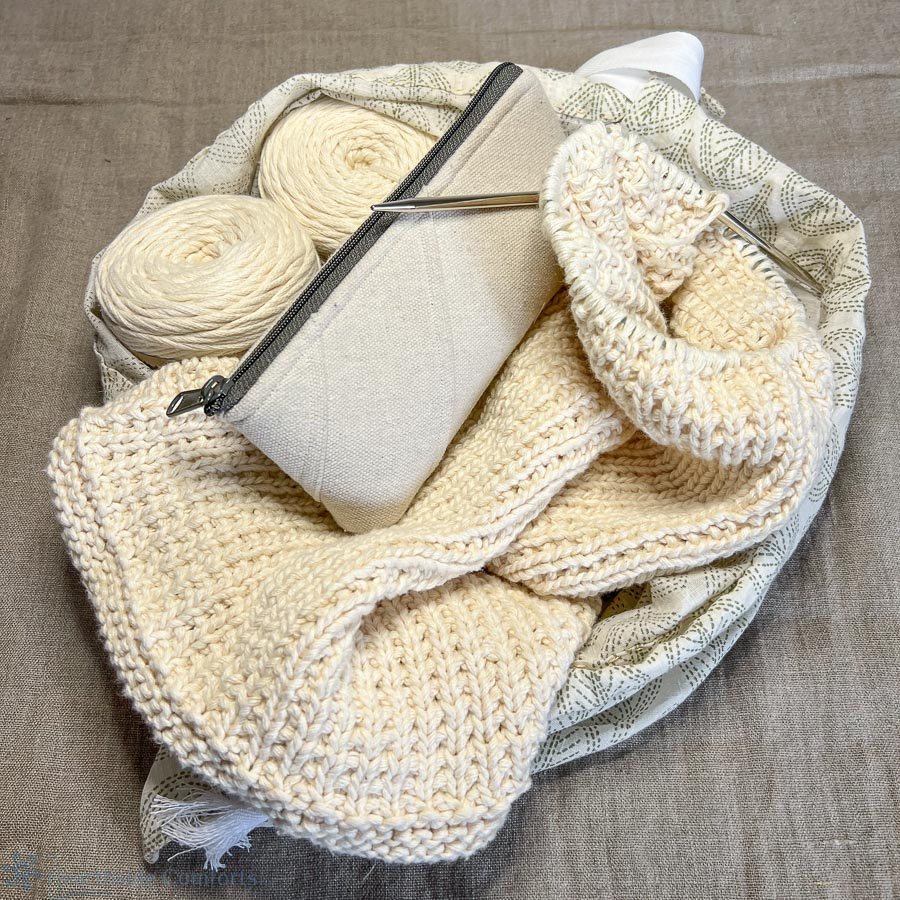
The bag can be kept open in a basket by a favorite chair, and then quickly closed, ready to take when you leave the house.


Basic sewing definitions:
*Casing - a folded opening to enclose elastic or drawstring.
**Running stitch - Make this stitch by passing the needle up and down through the fabric at equal intervals, making something that looks like a dotted line on the road.
***The right side of the fabric is the printed side and the wrong side of fabric is the other side.
****Whip stitch - a finishing stitch that is used to secure two pieces of fabric together by running the threaded needle around the fabric, and bringing the needle from back to top and repeating the process.
If you have any questions at all, please leave a comment below!
In 2022, I will be offering hand-sewing classes to purchase with both written and video tutorials! Keep this in mind if you are interested in learning how to hand sew! I think that learning to hand-sew is an important beginning. Once basic hand-sewing skills are mastered and you want to progress, then it’s time to invest in a sewing machine.
Disclosure: This post contains affiliate links. As an Amazon Associate, I earn a commission on qualified purchases at no additional cost to you.