
How to Make a One-Block Jelly Roll Quilt
In this blog post, I will show you an easy way to piece 40 strips of a roll of precut 2 1/2” strips of fabric into a quilt top. The finished size before borders is approximately 55” square.
In a future blog post, I will show you how to add borders to make a larger quilt. I will also be adding a downloadable PDF pattern to this post once I create the design in easy-to-print graphics.
The roll of fabric used in this post is from the Maple Hill collection from Moda Fabrics and was designed by Kansas Troubles Quilters. I bought my roll at Sew Classic Fabrics, but I don’t think they have it in stock anymore. I see that it is still available online. (The price has increased significantly since I added this link—I recommend, as always, that you try to find it at a local quilting shop instead of ordering online!)
If you can’t shop locally, another beautiful collection that is similar to the fabrics I used in this quilt, but with flowers instead of leaves, is this Hope Blooms Jelly Roll.
Earlier this summer, I was asked to teach a Jelly Roll Race class at Sew Classic Fabrics, a local quilting shop. While I was making the sample, the idea for the quilt in this blog post immediately came to my mind. The pattern is inspired by the cotton scrap quilts and pillows made by my Grandmother and Great Grandmother. I do not know what the pattern is called. My Grandmother always referred to hers as cotton crazy scrap quilts (and she made traditional velvet crazy quilts, too).
If you have ever made a Jelly Roll Race quilt, you will know that you have to piece all of the strips together end to end. But that is not necessary for this quilt.
Instead one-half of the strips are sewn together lengthwise to create a 20-strip rectangle, and then the other half of the strips are sewn together in the same way. Then the rectangles are trimmed to a square, cut into triangles, and sewn back together.
Supply List:
One 40-strip Jelly Roll of Fabric or 40 2 1/2” strips of fabric by WOF (44/45”)
Machine and Thread
Fabric Scissors
Rotary Cutter, Mat, and Ruler
Wonder Clips or Pins
Iron and Ironing Board
Instructions:
Step 1:
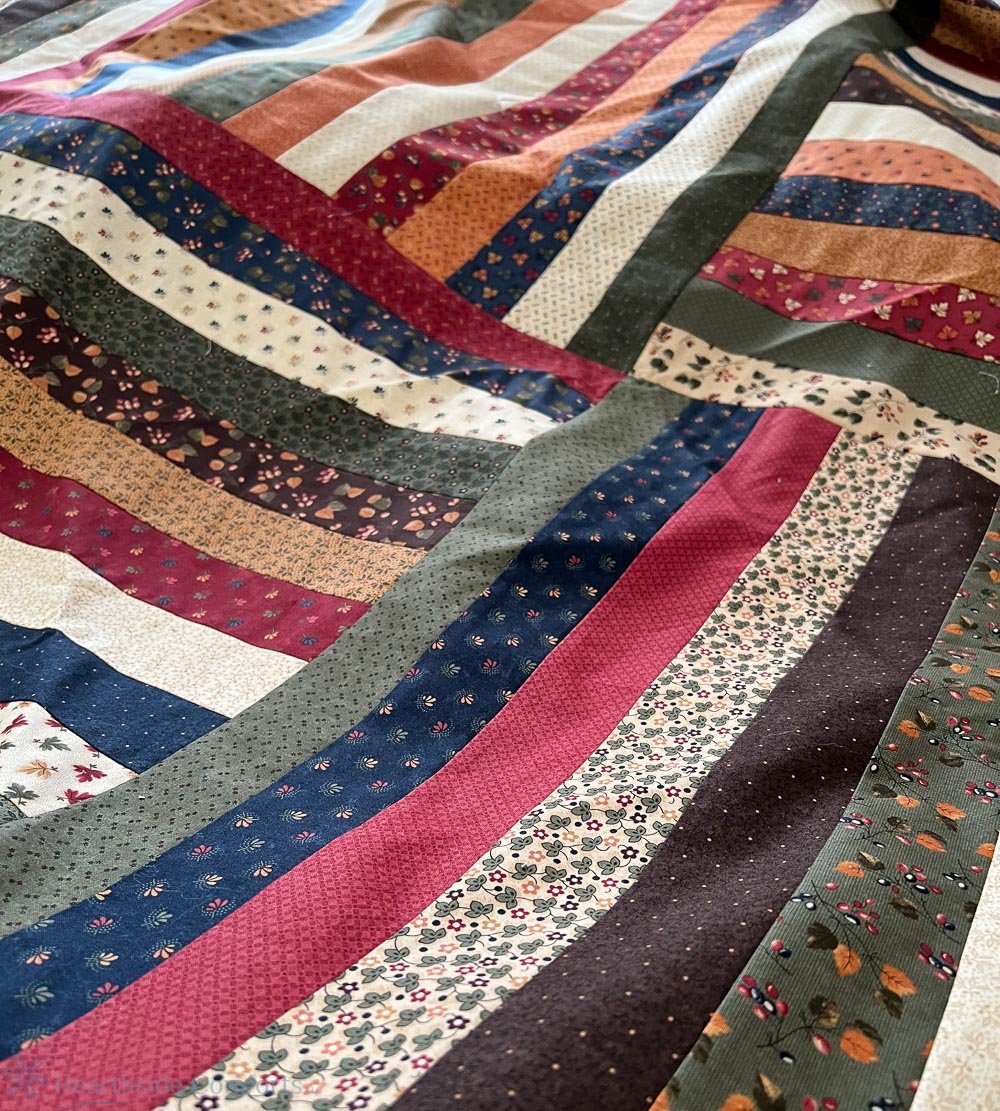
Open the roll of fabric and lay the strips out in two sets, alternating lights and darks and coordinating colors as you wish. The first and last rows will actually be the longest strips in the middle of the quilt. I would recommend that you choose different colors for these strips so that you don’t have a distinct pinwheel pattern in the middle of the quilt.*
If you have a roll with duplicates of fabric, you can arrange them in the same order in each set if you prefer. My roll didn’t have duplicates.

Step 2:
Stack the fabrics in the order that you want to sew them and place within reach of your sewing machine. (Make two stacks of 20 strips). Complete steps 3 and 4 with one set of 20 strips. You will be repeating the same steps with the second set once you have the first set sewn together.

Step 3:
Sew the strips together in order, using a 1/4” seam allowance. Because the strips are not exactly the same length, I found that lining them up from the middle helped the ends to come out a bit more evenly. Also, make sure that you sew in an alternating direction (start sewing at the end where you finish sewing) to prevent ending up with a rhombus-like shape instead of a rectangle.

Step 4:
Press the seams in one direction.

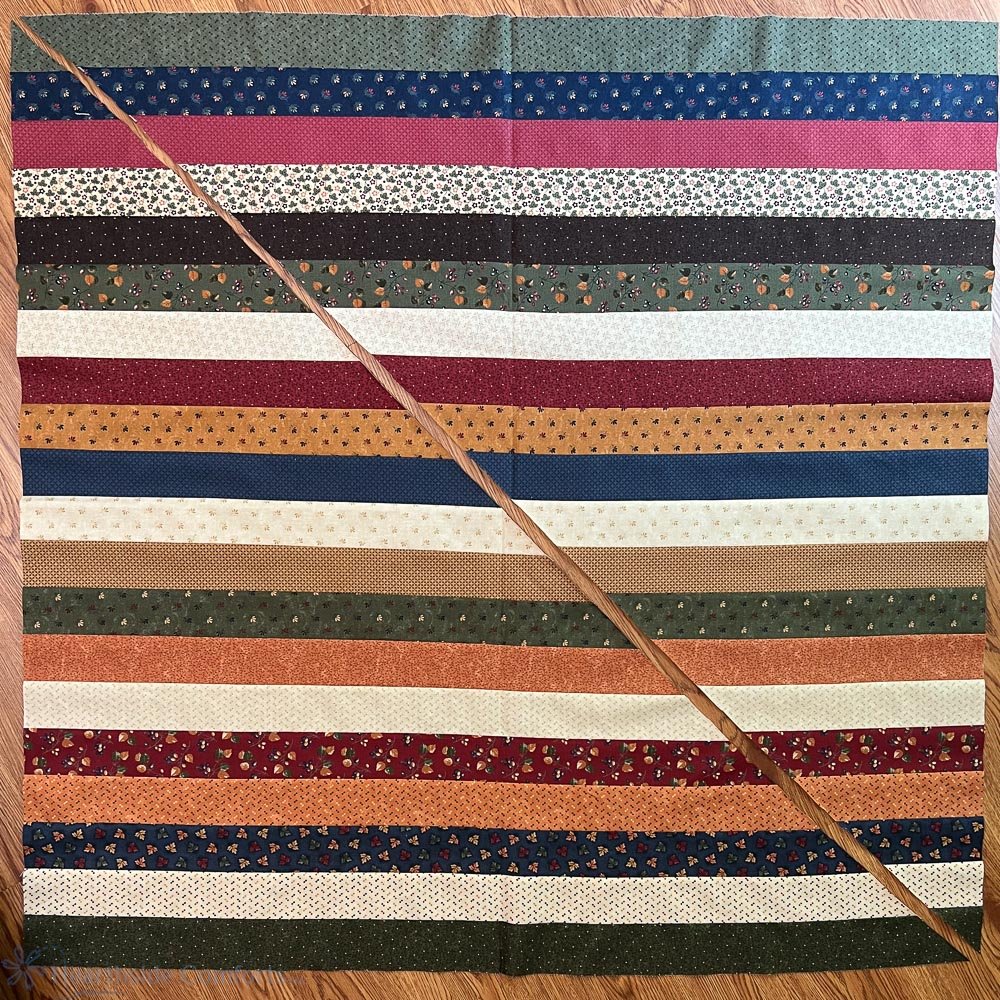
You should now have a 20-strip rectangle that looks similar to the photo below:

Sorry, the lighting was so bad when I was making the quilt. It was really hard to get good photos!
Repeat Steps 3 and 4 to create a second rectangle with the other set of 20 strips before proceeding to step 5.
Step 5:
Measure your rectangles from the top edge to the bottom edge (across the strips). Using this measurement, trim the selvage edges to make squares. Depending on whether you take a scant or a wide 1/4” seam allowance, your measurement should be around 40” to 40 1/2”.

Step 6: (NOTE: IT IS VERY IMPORTANT TO FOLLOW THIS STEP CORRECTLY!!!)
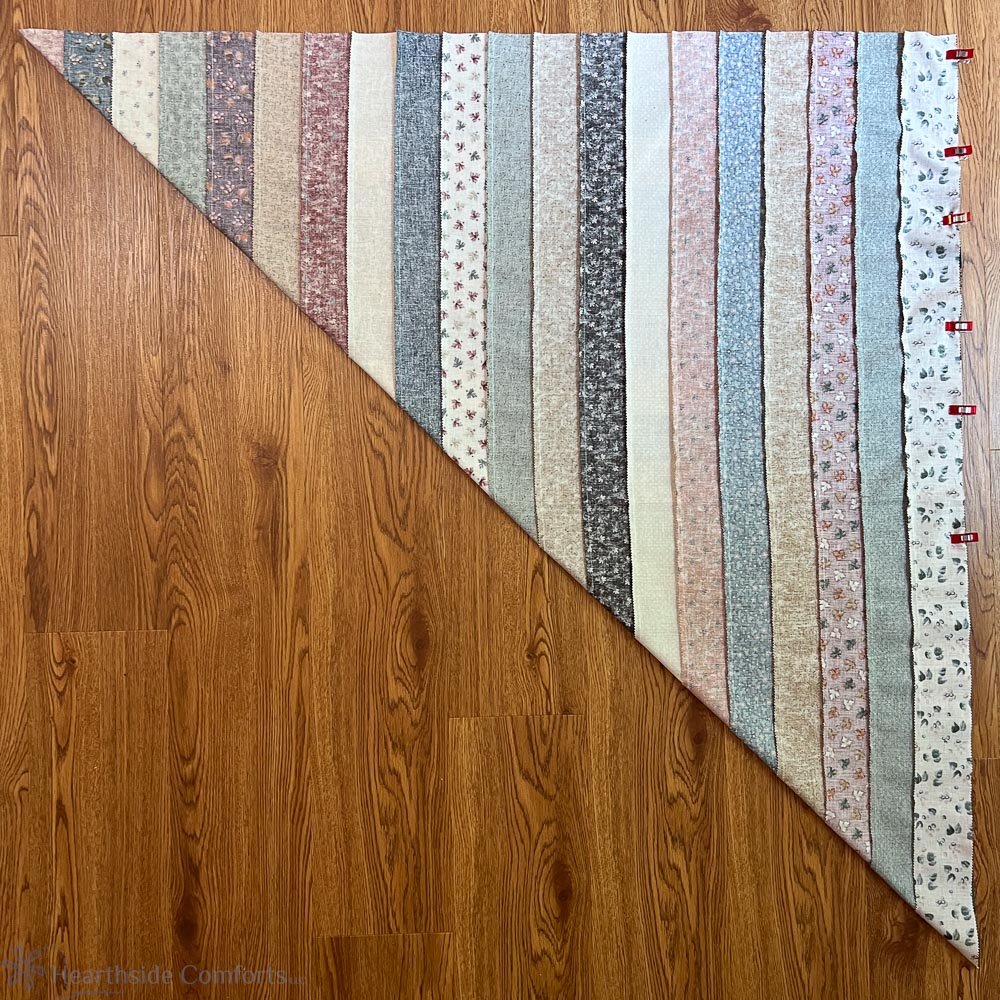
Place your square on a flat surface with the strips going in a horizontal direction. Fold the bottom left corner up to the top right corner and finger press. Cut on the line. (You can also cut by leaving it folded and cutting on the fold, but I found it easier to unfold and cut on my line.)
Once you have made this cut, be very careful not to stretch out the cutting line since it is on the bias. You can stay stitch it immediately or stay stitch once you have all pieces assembled.
Repeat with the second square—cutting exactly like the first square: the cutting line must be from top left to bottom right corners across the horizontal strips. (If you don’t believe me, try it on paper first.)
Step 7:
When you have 4 triangles ready, place two triangles, cut from the same square, opposite one another. Repeat with the triangles from the other square.

* I made the mistake of choosing green fabrics for the top and bottom row of one of my sets of strips. As you an see, the green in the very center of the quilt looks like half of a pinwheel design. I wish I would have chosen a blue or other fabric instead. Of course if you want a pinwheel look, you could use similar colors of fabrics on the top and bottom of each set.
Step 8:
Sew two triangles together where the ends of the strips meet the long strip of the adjoining triangle, placing right sides together. Repeat with the other two triangles. Press seams toward the long strip.
Step 9:
Complete the block by placing the two larger triangles created in step 8, right sides together, and sewing the long diagonal seam. Press seams open.
Step 10:
If you haven’t done so already, stay stitch around the block edges.

Decide what size you want the final size to be and add borders as desired. In my next blog post, I will be sharing how I make this quilt into a large throw size. I will also share options to create a twin, full, queen, or king size quilt using this block as the center.
Disclosure: This post contains affiliate links. As an Amazon Associate, I earn a commission on qualified purchases at no additional cost to you.