
How to Make Braided Fabric Baskets Step-by-Step Instructions

I wrote this post to be featured on the blog of fabric.com, where I purchased the fabric that I used to create the baskets when I first designed them. Of course, these baskets can also be made with scrap fabric for great upcycling project! According to one of my friends, though, not all sewing machines can handle sewing through the thickness. I use a Bernina 1090S, which I have owned for over 25 years!
Why: The Inspiration
My first memory of a braided rug is seeing the one that my grandparents had in their family room. With fascination, my eyes would trace the brown, gold, orange, and green colors as they twisted together in braids that wound around in an oval to cover the green linoleum floor. Although that rug was purchased and not made from scraps, braided rugs always bring to mind a simpler time—when life was a slower pace, but hands were never idle. I envision a homemaker sitting in her rocking chair by the light of the hearth in the dark of the evening, pulling strips from a basket to braid together, and stitching them together by hand, because upcycling was a way of life when resources were scarce.
Inspired by braided rugs, I decided to make some coasters that looked like miniature braided rugs with a modern twist—ones that were neutral in color and made with new fabric. Using Robert Kaufman Kona Cotton 57" PFD Bleach White fabric, I made coasters, which led to making a Christmas tree skirt, and then braided fabric baskets, which I will show you how to make in this post.

What: The Application
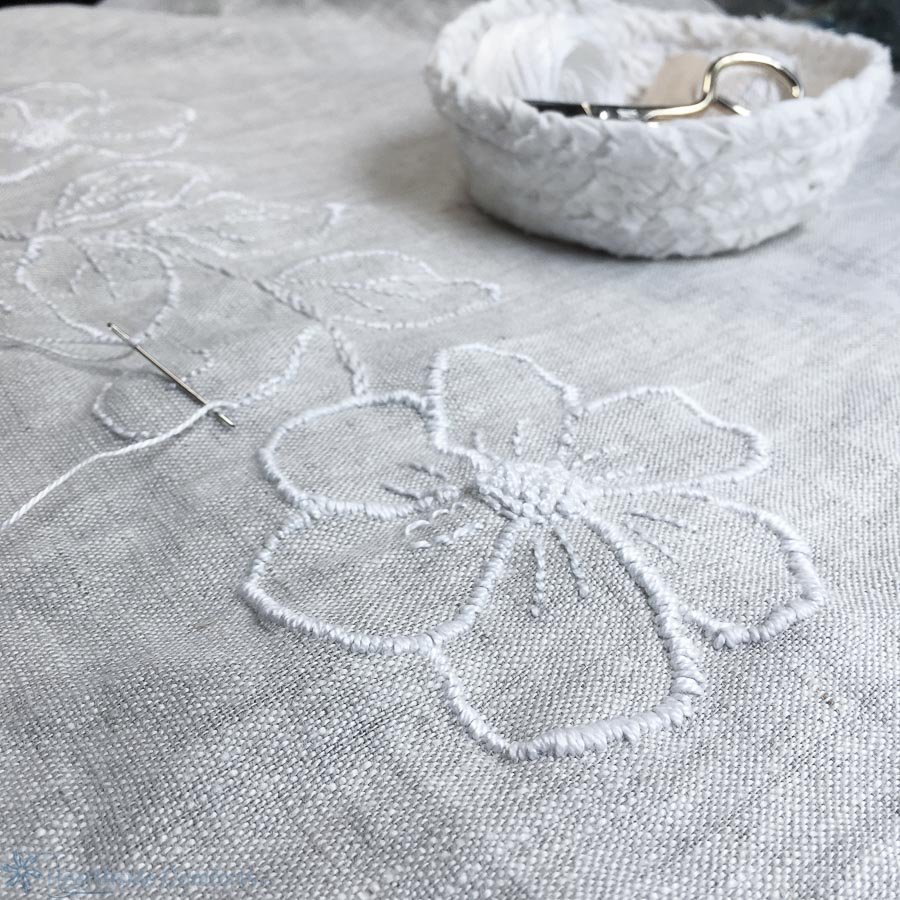
These baskets are perfect for so many uses! The small ones made with 6 or 9 strips of fabric are great for holding hand-stitching supplies, sewing supplies next to your sewing machine, hairbands, jewelry, or collections of small items.

I use the 15-strip size basket to hold a ball of yarn on my lap as I knit.
The one made with 18 strips is great for holding multiple balls of yarn or for holding fruits or vegetables in the kitchen.

You will need a few supplies to get started!

Supply List:
Robert Kaufman Kona Cotton 57" PFD Bleach White fabric*
Matching thread - I use Superiors Threads Masterpiece color #151
Heavy sewing machine needle (I used jean/denim size 100/16) (affiliate link)
Needle for hand-sewing (optional—can be used for sewing strips of fabric together while braiding away from your sewing machine) (affiliate link)
Fabric scissors (affiliate link)
Sewing machine that can handle sewing thick fabric
Ruler (affiliate link)
Safety pins or Wonder clips (I prefer Wonder clips) (affiliate link)
*To know how much fabric you will need, see the photo below. Order a bit more than you will need because some will be discarded as you straighten the grain. In other words, you may need 1/4 yard for one small basket that requires 6 1” strips.


Please note that the measurements given above are to be used as a reference only. I have made many of these baskets, and each one is unique, with slightly different measurements because it is handcrafted!

How: The Instructions
Step 1:
Along the selvage, cut slits in the fabric at 1” inch intervals and tear the fabric into strips the width of the 57” fabric. The first strip will probably not be perfectly straight if the fabric has been cut and may need to be saved for another purpose or discarded.

Note: I like to tear my fabric instead of cutting it for this project because it provides a beautiful, feathered appearance on the raw edges and keeps the grain of the fabric straight. Remove any of the loose strings caused by tearing before you begin braiding.
Step 2:
Taking three strips, sew or fasten together with safety pins or Wonder clips at one selvage end. Tightly braid strips together.

Step 3:
To join the next strips, overlap the ends and sew them together. Note: If I am braiding away from my sewing machine (this is a great project to do while watching a movie or participating in a Zoom call), I sew the strips together by hand. Otherwise, I sew them together at my machine. And as you will see in the photo below, I fold the strips in half when I braid and sew them together, but that isn’t necessary.

Step 4:
When you have braided all of the strips necessary for your basket, curl the beginning of the braid in a clockwise direction. Using a zig-zag stitch (I use a stitch width of 3 and length of 1 1/2), sew the braid together, making sure that the braid is coming in from the right side of the needle so that the basket shape grows on the left. You can trim the ends of the braid or leave them in place and sew over them.


Step 5:
Sew until your base measures the desired size plus an additional 1/2” (because when you begin sewing the sides, the outer row of the base curves upward). Using your left hand to hold it in place, angle the base up as far as possible to begin the first row of the sides of the basket. Apply a very slight tension to the braid as you sew the sides of the basket.


Step 6:
As you are sewing, make sure that the edges of the braids come together snugly. If you see any spaces where they are not snug and securely stitched, backstitch and sew back and forth until the opening disappears. Sew until you reach the end of the braided strips. Tuck the ends of the braid under the edge of the basket, sew to fasten in place, and then trim the excess fabric.


Step 7 (Optional):
If you wish to shape the basket to make the bottom lie flat (if it has more of a bowl shape), you can steam it with your iron or a tea kettle (just don’t burn yourself!) and press the base flat by finger-pressing the area where the base meets the sides. Or turn the basket upside down and hold the iron above the basket and steam the bottom with very light pressure of the iron (don’t crush the basket by setting the iron on it—just hover the iron over the bottom to flatten it, using steam and the heat setting for cotton).

If you make any of these baskets, I would love to see pictures! If you share on social media, please tag me in the photos! @hearthsidecomforts #braidedfabricbasket
Disclosure: This post contains affiliate links. As an Amazon Associate, I earn a commission on qualified purchases at no additional cost to you.